Introduction
Installing ePRINTit FileToPrint For Windows
Installing ePRINTit FileToPrint From The Command Line
Configuring If And How User Credentials Are Saved On The Desktop
Creating an ePRINTit Cloud Account
Uploading Files to the ePRINTit Cloud Using FileToPrint
Releasing Print Jobs Using An ePRINTit Embedded App
Releasing Print Jobs At An ePRINTit Kiosk
ePRINTit FileToPrint is used to upload files directly from a desktop computer or virtual desktop image to the ePRINTit Cloud. This version of FileToPrint is installed on a Windows PC or workstation. Another version exists for Macintosh computers.
FileToPrint is an easier way to upload files since it's as simple as selecting the ePRINTit printer and then clicking Print.
This document will expand on installing the ePRINTit FileToPrint on a Windows client, starting an ePRINTit Cloud account, uploading files to the ePRINTit Cloud and releasing the file from the cloud for printing to the ePRINTit Kiosk and the Embedded App at the physical printer (HP/Xerox).
ePRINTit FileToPrint is installed on a Windows PC or workstation. The minimum system requirement for FileToPrint is Windows 7 or later.
To install FileToPrint, do the following:
- In a Web browser, go to www.eprintit.com/downloads and download FileToPrint.exe and save it to the desktop of the Windows PC.
-
From the desktop, double-click FileToPrint.exe.
- To change the installation location, click

 and then navigate to the desired location.
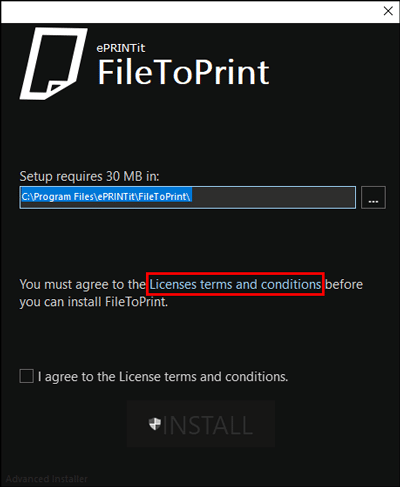
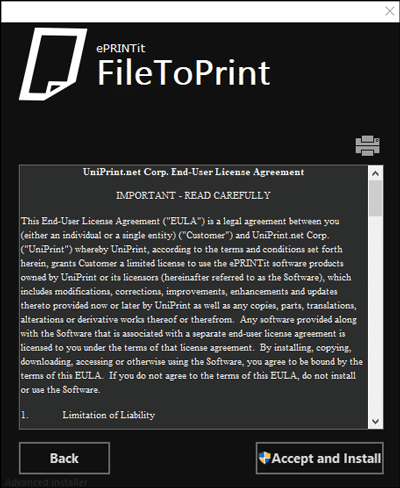
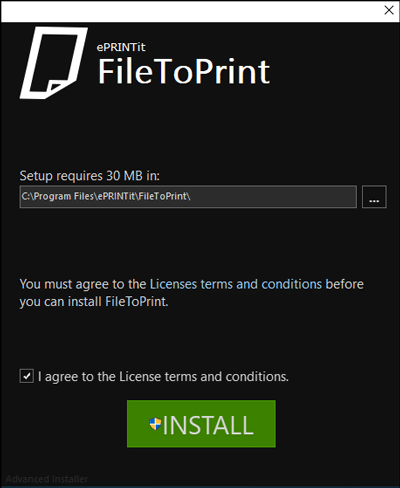
- To review the license agreement, click License terms and conditions. Review the license agreement and then click Accept and Install.
- Or simply click I agree to the License terms and conditions and then click Install.
- If User Account Control (UAC) is enabled, click Yes to allow VC_redist.*.exe and FileToPrint.exe to make changes to the PC.
- Click Finish.
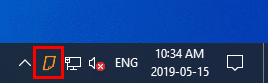
- The ePRINTit icon will appear in the notification area.
FileToPrint can also be installed silently from the command line.
To install FileToPrint from the command line, do the following:
- Open a command line prompt as an administrator.
-
Change the directory to the location where FileToPrint was saved.
-
At the prompt, type the following and then press ENTER:

By default users have the option to save their credentials when printing through FileToPrint and their credentials are pre-populated the next time users print. Users can implement this feature by selecting "Remember Me" when printing.
This time-saving features enables users to continue to print without having to re-enter their credentials each and every time they click Print. While this feature is very useful in single user to desktop PC environments, this feature can create a security issue, when multiple users access a desktop PC. Such an environment, for example, a computers in a computer lab in a school, can result in users drawing down ePRINTit funds from an unsuspecting user.
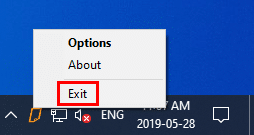
To prevent this from occurring, administrators can set a registry key on the desktops to change this behavior, by doing the following:
- On the Windows desktop, in the notification area, right-click
 and then select Exit.
- Click Start and then type regedit.
- Under Search, click regedit to edit the registry.
- In the registry editor, expand the
 key and double-click Flags.
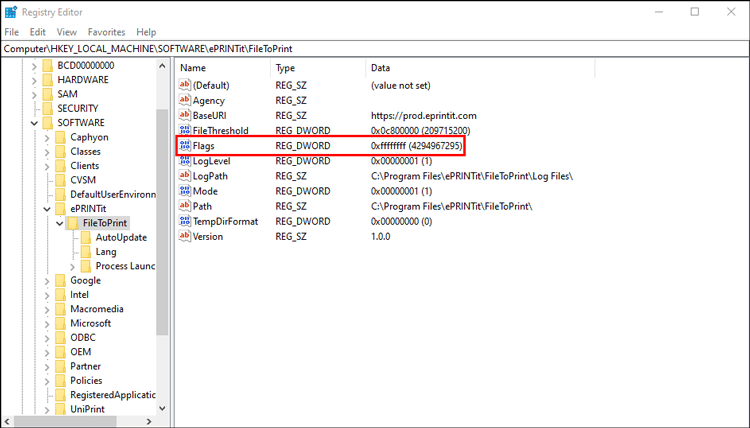
- Under Base, click Decimal. The Value will change to 4294967295 which is the default value. The default value displays the Remember Me check box and pre-populates the last user's credentials.
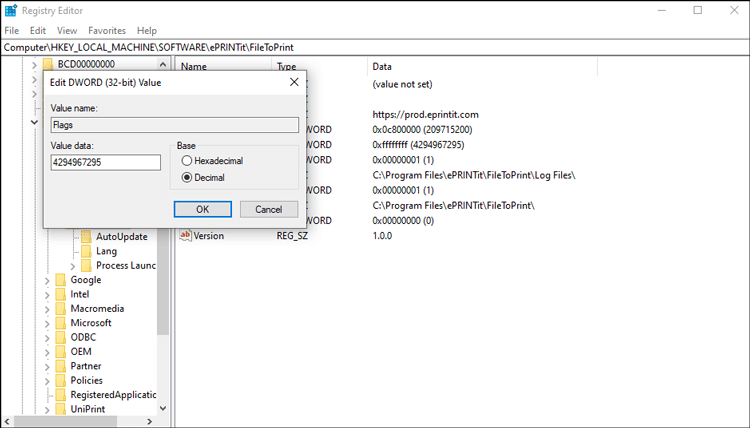
- Under Value, enter the value depending if and how you want to display the Remember Me check box and save the last user's credentials.
Value Description 0 Hides the Remember Me check box and does not save or pre-populates the last user's credentials. 1 Shows the Remember Me check box, but does not save or pre-populates the last user's credentials. 2 Hides the Remember Me check box, but saves and pre-populates the last user's credentials. 3 Same as the default. Shows the Remember Me check box, saves and pre-populates the last user's credentials. - Click OK.
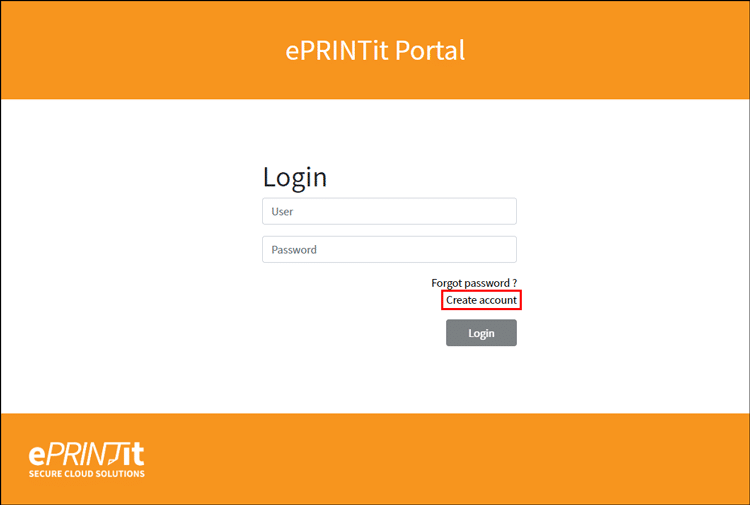
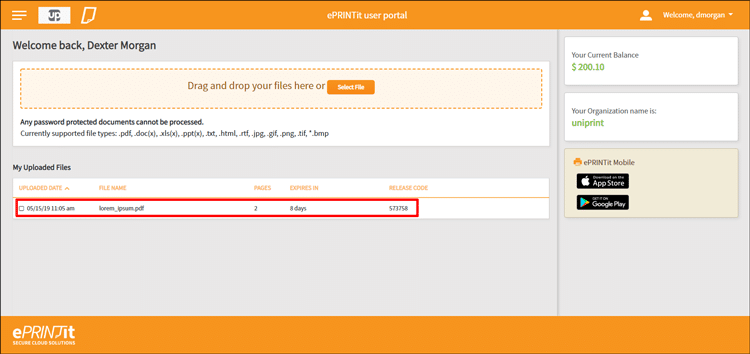
To get started with ePRINTit, an online account needs to be created first. Documents and other files to be printed are first uploaded to this account,such that if additional printing is required at a later time, the document is readily available.
To create an account, do the following:
- In a Web browser, navigate to your organization's ePRINTit Web site. It will be something similar to MyOrganization.eprintit.com. Contact your administrator, if you don't know your organization's Web portal URL.
- Under Forgot password, click Create account.
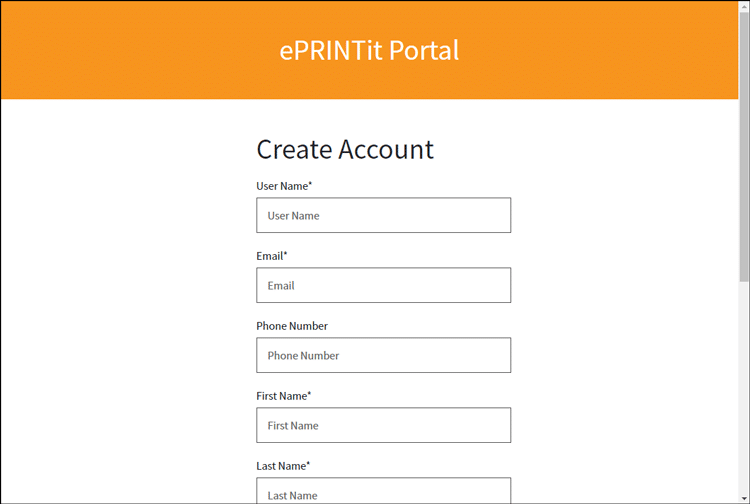
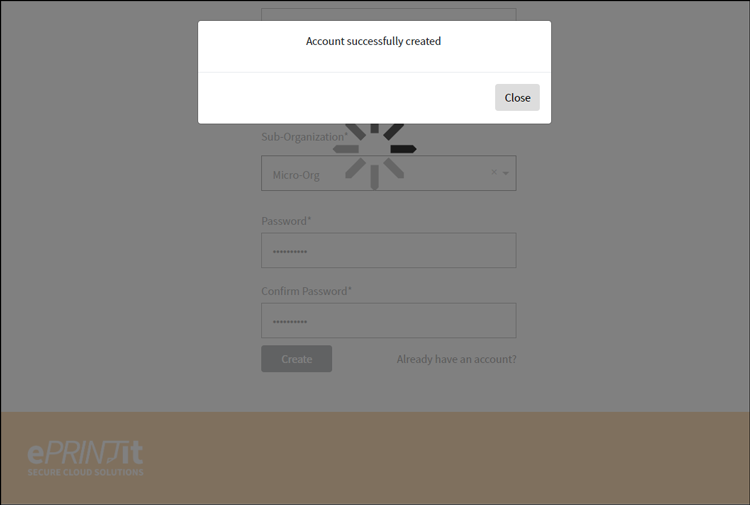
- Complete the form and then click Create. NOTE: For Sub-Organization, contact your administrator. The Sub-Organization could be by faculty, college, campus, department or project, depending on what was set up by your administrator.
- Click Close.
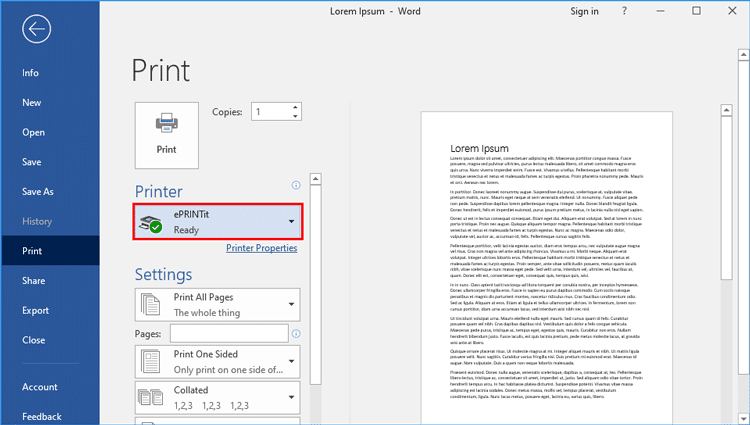
Uploading files to the ePRINTit Cloud is as simple as printing. In the following example, we'll be printing from Microsoft Word, but the process is similar for almost any Windows application.
To upload a file to the ePRINTit cloud, do the following:
- Open an application from which to print, for example, Microsoft Word. Refer to the application documentation for help on printing from the specific application being used.
- From the File menu, click Print.
- From the Printer list, select ePRINTit and then click Print.
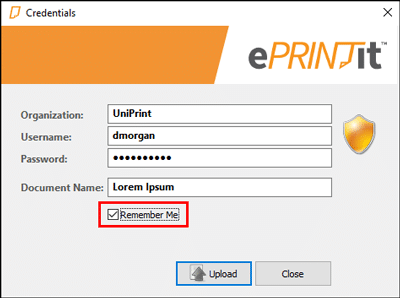
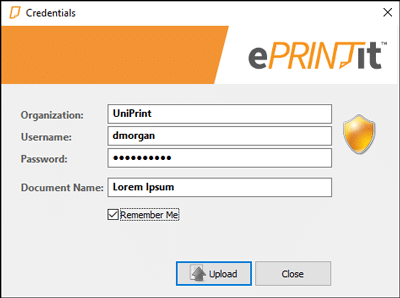
- Enter your ePRINTit credentials. Beside Organization, enter the organization name that was used when you registered for an ePRINTit Cloud account. To avoid having to re-enter this information each and every time you print to ePRINTit, select Remember Me. Click Upload.
- A message will appear in the notification area.
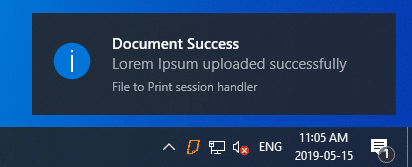
- The newly uploaded file will appear in the ePRINTit Cloud and will be available for release.
Files in the ePRINTit Cloud can be released at designated ePRINTit Kiosks or if your organization has it set up, at the printers console by using the ePRINTit Embedded App.
After your files have been uploaded to the ePRINTit Cloud, you can proceed to release and print them out from any multifunction printer that has the ePRINTit Embedded App installed. NOTE: The screen shots below are for Xerox MFP devices and are only used as an example. Actual screens will differ slightly depending on the manufacturer and version of the ePRINTit Embedded App.
To release print jobs, do the following:
- At the printer console, tap ePRINTit. NOTE: If the Walkup screen has be configured, the screen greeting users, will be the one shown in step 2.

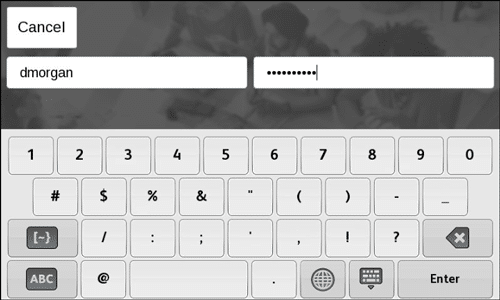
- Tap Login.
- Tap to enter your user name and password and then tap Enter.
- Tap Cloud.
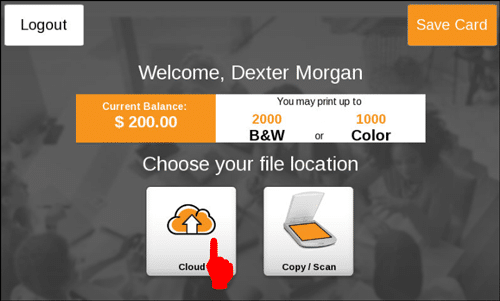
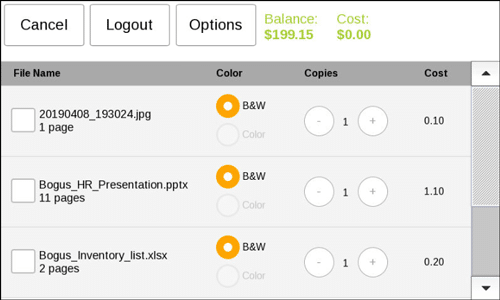
- Tap to select a file to print and then tap Print.
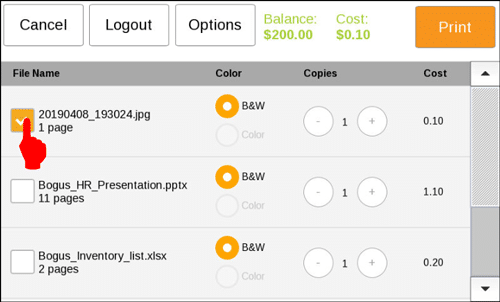
To change print options, tap Options.
Tap to change print options and then tap OK.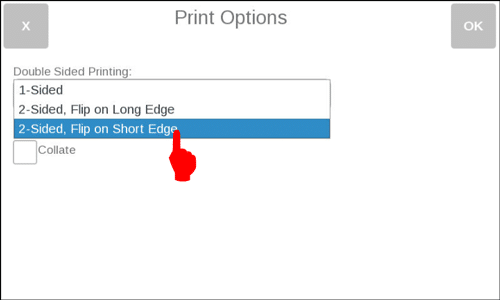
- To continue to print more files, tap Print More.
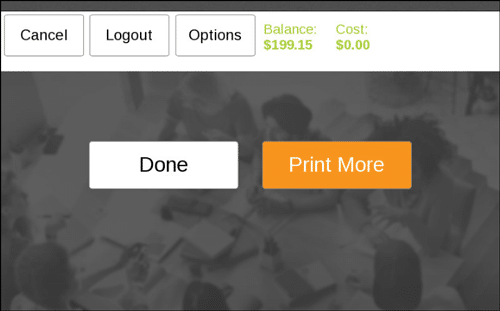
- Tap to select another file to print and then tap Print.
- If done with printing, tap Done and you will be automatically logged out.
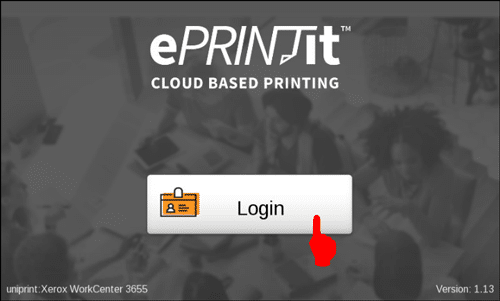
Some organizations have deployed ePRINTit Kiosks similar to the one below although the kiosks maybe decorated with the organization's colors and graphics.
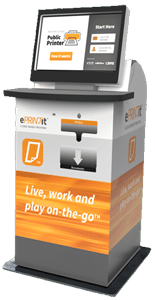
Depending on the type of kiosk deployed some can print not only black and white documents, but also color documents and even color photos on photographic paper. The screen shots below are generic screen shots for a school or university and are only used as an example. ePRINTit screens can also be personalized for each individual organization with logos and corporate colors.
Releasing and Printing with a Username
To release and print documents saved to the ePRINTit Cloud at an ePRINTit Kiosk and you have an ePRINTit Username, do the following:
- If swipe-authentication is enabled, swipe your card or tap Log in with Username.
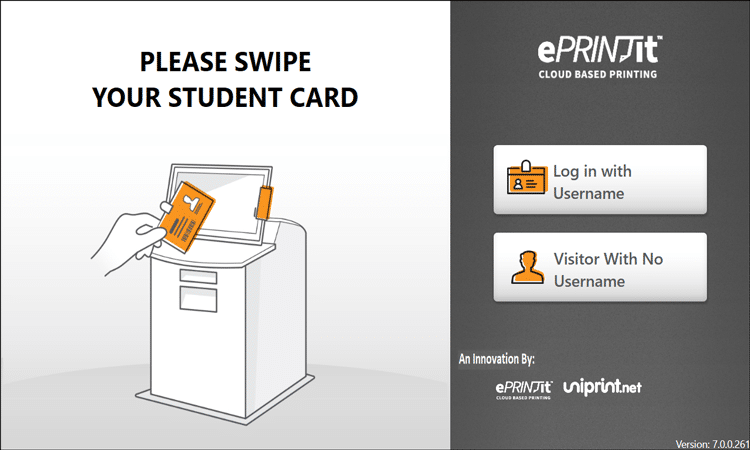
- Tap to enter the credentials you created when registering with the ePRINTit Cloud and then tap Login.
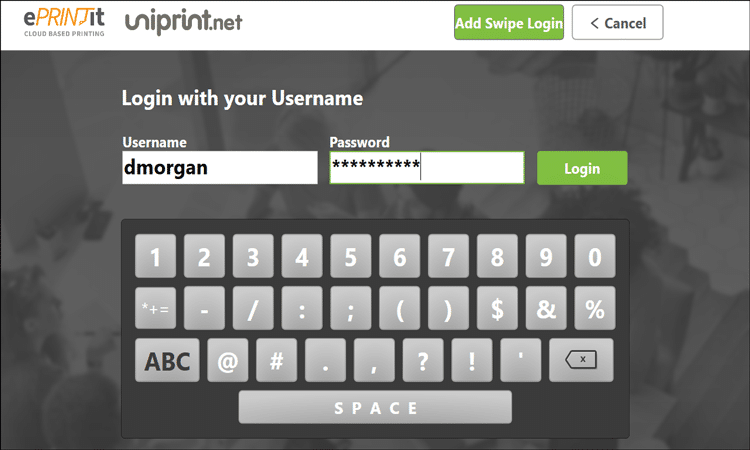
To simplify your login, you can create a Swipe Login which will associate your Username with your ID card. To create a Swipe Login, tap Add Swipe Login and the follow the instructions.
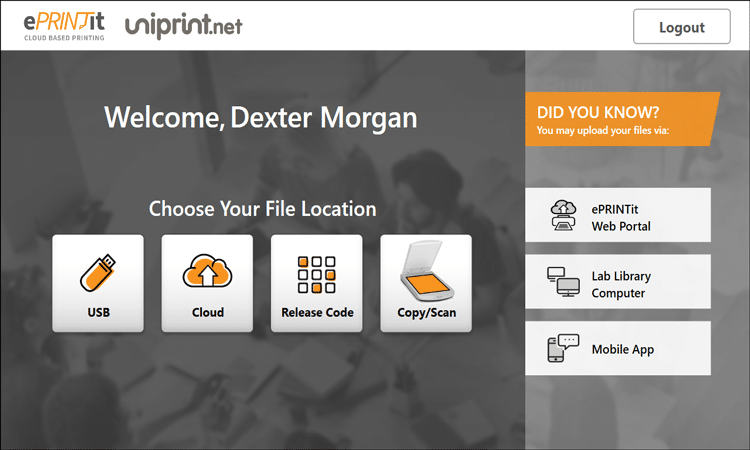
- Tap to select the source of the document. For example, to print the document that was uploaded to the ePRINTit Cloud, tap Cloud.
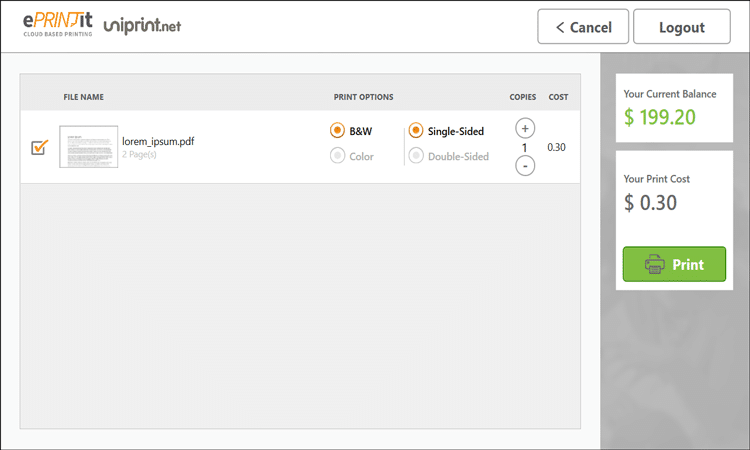
- Tap to select different Print Options. To preview the document, double-tap the file name.
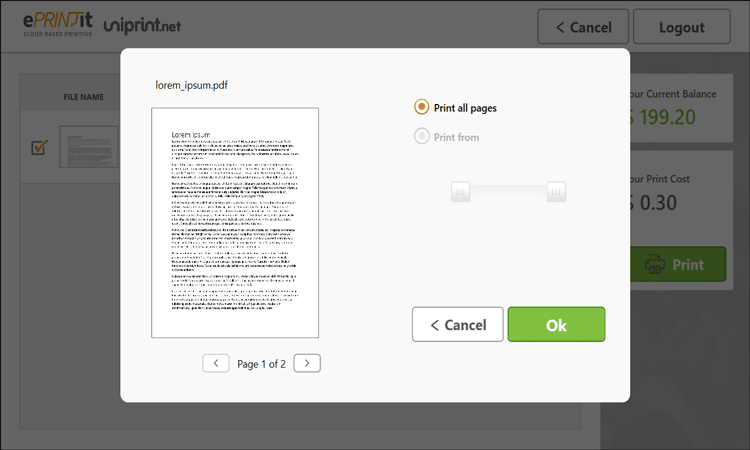
- Tap to select a page range to print and then tap OK.
- Tap Print.
- The current balance on your ePRINTit account will be displayed and your document will be printed.
Releasing and Printing Without A Username
For those who do not have an ePRINTit Cloud account, the option to print as a Visitor With No Username is available. However, the number of options will be limited.
To print without an ePRINTit Cloud account, do the following:
- At the kiosk, tap Visitor With No Username.
- The file to be printed can be uploaded from an USB flash drive or it can be scanned from the printer itself. If you uploaded the documented by using the Public Print App, then the Release Code generated in this app.
- Before printing, a credit card is required and the fee includes a transaction fee.
- After paying, tap Print.